This post is here to offer a little help with our current CAL/KAL on the Everything Zen Group on Ravelry. Because, sometimes it just makes it easier to see things in pictures. :-)
We are making the Amiga Neck Cowl by Torirot Design. Please note, this is not the pattern tutorial just help with the joining and a close up of where the stitches should be. If you would like the download the pattern you can do so by clicking on the link :-) My notes here assume you have the pattern and basically understand crochet patterns and that you know what to do.
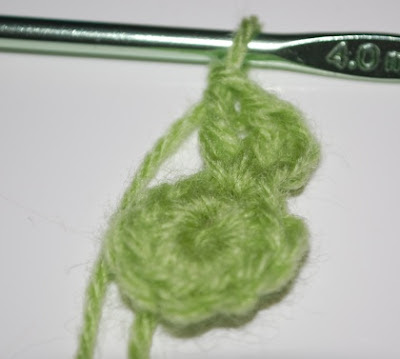
So here goes... Round One.....you should have chained 5 and joined with a slip sitch. Then you chain 2, and then make 9 single chains into your ring. Join with a slip stitch to the top of your chain 2. You end up with this little circle.
Now Chain 3 (this counts as your first DC) and then make 2 DC in the SAME stitch. Skip one and 3DC in the next. as per pattern. Again join with a slip stitch to the 3rd stitch (up the top) of your first 3ch.
(Sorry in my usual airy fairy fashion, I deleted the wrong picture. So don't have one of this step.
Here are a couple of your next round joins though. Same principal except you are making bigger stitches. As you can see I have joined to the top of the first ch3 and then made my ch4 for the start of the next round.
If you prefer you can join by slipping your stitch in the gap between your first and second dc rather than trough the top stitch. It pretty much looks the same either way.......
And here is a fuzzy shot of the other way I explained, sigh, in my own defense it was all taken pre caffeine fix, early this morning. See the hook just goes straight through the top of the first stitch.
Round 4 starts with a ch 4 straight on top of your join.....(please ignore the stitch next to it. Its wrong!) This is the section where you cluster your TR stitches to form the top of the flower.)
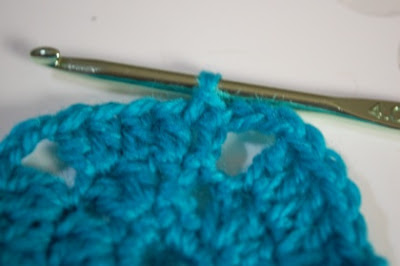
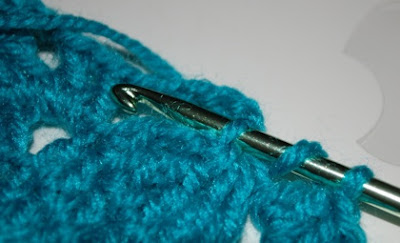
And you guessed it......Your next join goes into the top of that cluster, which is probably the part that can be a bit confusing for you. It is basically the first stitch of your chain 5 and you can see it as it looks like a little circle. And it will look like its very slightly to the left of the top of the petal. Poke your hook through the hole and pull the yarn through to make your slip stitch to join. Here are a few pics of the process.......
Once you have pulled it through. Make 3 chains. This will be your first DC for the next round. Your next DC will go into the 5 ch space directly next to your first stitch. (BUT not in the same hole). Followed by the next DC then Ch 2.
Next you make 2 DC into the same 5 ch space.......with your 3rd DC going into the top of the 1st DC in the previous round........ so while it looks like you have 3DC in each space, each section actually has one of the DC's popped into one of the side stitches (Hope this makes sense!) You use this method all along the edge.
On the next petal top you are going to make a corner so your 3rd DC goes into the hole at the top of the petal.......
Then you chain 3 and make your first DC of the next set into the SAME hole and continue on as before.
When you get back to the beginning of the round, your very last DC will go into the same hole as the very first ch3. The one you started with. Then you ch 3 and join with a slip stitch to the top of the first Ch3 stitch.
Now you have finished round 5 and it should start to take a little shape......looks a bit wonky but its getting there. ;-P
Now you need to turn your pentagon over so the wrong side is facing you. The last round is worked in the other direction. slip stitch into the ch3 space and chain 3 (counts as your first DC) Continue along the row as per pattern.
Your corners should be at the top of each flower petal......
Note: I seem to have lost yet another picture of the beginning of the round, but as you can see when you are at the end you should have had your first corner complete so your join goes to the top of the first DC on the side of the work.
Again, just incase you are unsure, slip the hook into the top stitch and simply pull through. At this stage you cut your thread and slip it through your stitch to finish. It leaves a nice neat ending.
TA-DAH.......We have our very first pentagon! Yay!
Now since we are here already and we know we are going to have to join those pentagons. We might as well cover that part too! I have to admit that as easy as it is, it took me several goes of reading, re-reading and as simple as the pattern instructions were I just could not picture it at first. It really is simple though once you know what to do... So here goes......
With your pentagons 2 -6, you only work the first 5 rounds completely before joining. So we start with our first cluster of 3DC in the corner space .........
Now lay your new pentagon on top of your first one, right sides facing each other.
Then chain 1, slip stitch to the corner space of your first pentagon and chain 1 again. This creates your corner join. It really is as simple as that!
Now work 3DC in the same corner space of the 2nd pentagon only....
See they sit in front of each other now.
Then you slip stitch into the next 3ch space of the first pentagon and chain 1, then 3DC in the GREEN one, yes lets just say the green one, it makes it easier. LOL
You basically work your way along in the manner, slip st and 1 ch, in between each 3DC till the end. It will look a bit like this on the side.....
When you get to the next corner you ch1, slip stitch and then ch1 for the corner space. Then continue along the GREEN side only (starting with you second corner 3DC set) to finish your pentagon just like the first one.
Corner...... always at top of petals
Your corner after joining row.......
And your join at the end...... just like the first pentagon....join at the top of the first 3DC cluster and cut your thread and end off.
And WALLAH....... you now have two joined pentagons with only 5 more to go! Yay!
Now of course yours will have a less noticeable join as your sock yarn should blend in a lot better than these two very different colours do! Happy crocheting my lovelies. Hope you have fun with it!
Mine is looking rather interesting so far......
Hugs and smoochies xoxoxo


